Legs are absurdly strong if you think about it. Most people’s squats are not limited by how much force they can produce through their legs, but by their back. Most people can leg press, machine hack squat and hip thrust far more than they can actually back squat. Unilaterally, people can squat more than bilaterally – meaning, with a little practice you’ll be able to split squat more than 50% of your maximum back squat.
This is because the squat is limited mostly by how you can handle the weight while it’s resting on your shoulders and back.
If we were squatting weight purely with our hips, we would handle much more. Picture old strongmen lifting several people off the floor through a belt and chains attached to their hips (that’s called a hip lift). But the competition squat is strict in how it needs to be accomplished – you must have the bar firmly on your back, with no slipping, and you must hit depth before coming back up again, locking your hips out to finish the rep.
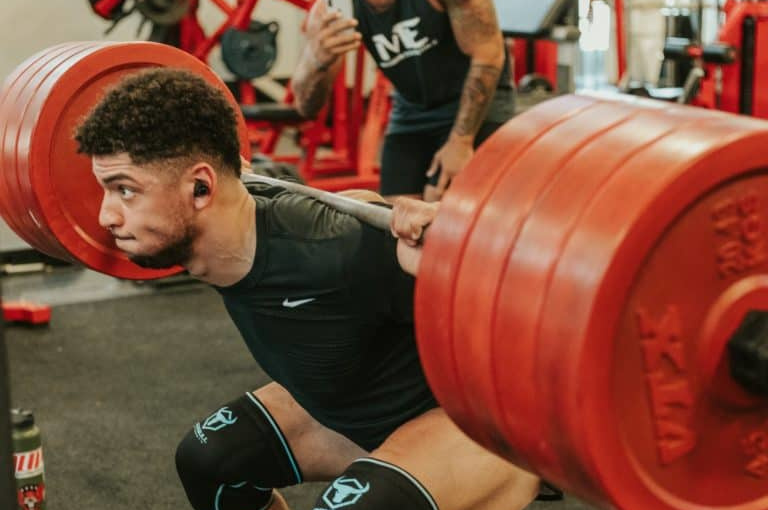
The reason the low bar squat became the most popular way to break world records is because the closer the bar is to your hips, the more weight you move.
For most people, the low-bar squat might provide an advantage. But not for all. Certain anatomies are more suited to different styles, and playing around with both is key.
I’ve previously mentioned that the squat used to be my worst lift in terms of comfort, proficiency, and form, and it is only through sheer stubbornness that I’ve managed to turn that around. Despite having poor leverages for a squat, it’s one of my favorite exercises, and I’m always excited to squat when the time comes.
I’ve also gone through countless phases and tried many different ways to improve both the weight I put on the bar and the optics of my lift and have come up with a fairly comfortable and consistent squatting form. My first lesson to any novice lifters looking to get more experience under the bar: try everything out and figure out how you perform best. Anyone who tells you there’s only one right way to squat is wrong, because this is a movement that’s just as, if not more versatile than the deadlift, and requires form that specifically adapts to you and your body, rather than the other way around.
The Squat Prep
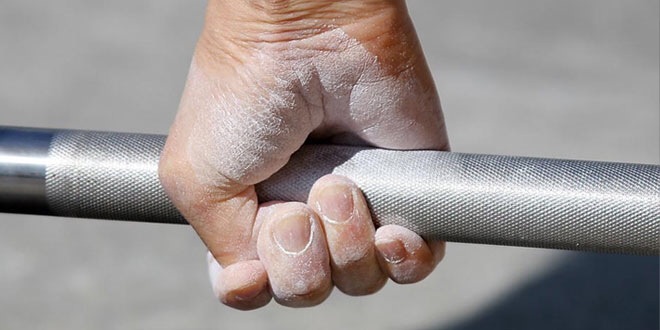
The low-bar squat requires a fair amount of shoulder mobility, because the goal is to get the bar far enough down your back that it comfortably rests on a shelf created by your rear deltoid muscles. In the meantime, you want to drive your elbows back and simultaneously maintain straight wrists. This puts a massive amount of stress on inflexible shoulders, which means you either need to work on your mobility if you can’t get into this position, or:
- Opt for a much wider grip than normal, eliminating the need for flexible shoulders.
- Keep the elbows almost perpendicular to the floor, wrapping only three fingers around the bar and using wraps to protect the wrist, like Ben Pollack.
Your hand position will depend entirely on your flexibility. Ideally, you want your hands as close to your shoulders as possible. The further apart your hands are on the bar, the more conscious you have to be of your upper back, focusing on squeezing it as much as possible. If you’re getting your hands together real close, your shoulders will force everything around your upper back to be tight as hell anyway.
I typically start by driving the bar as forward as possible, until it hits the edge of the power rack. You won’t have to do this in a monolift or in an IPF squat stand. I just do this as a way to “power up” in my mind, charging forward, while simultaneously getting the bar really deep onto my deltoids. Tightness is key here, so really try and dig the bar in there.
Next comes the feet. I start with a fairly narrow stance for the walkout, about shoulder width. I start consciously turning my legs outward in the hips, since I have a pretty wide stance and I want to make sure that from descent all the way to the squat out of the bottom, I’m consciously pushing my knees out and keeping everything in line with the toes.
Then, I take a long, deep-ass breath. First, I slowly push out every single ounce of air from my lungs, and then fill my belly up, and take one last gasp, and squeeze the abs. I’m trying to compress the air in my body as much as possible, picturing an incredibly tight and strong cylinder from hips to neck.
Then it’s time to unrack. Your knees should be bent when you’re under the bar, and the bar’s position should be a good two inches or so under your usual shoulder height. Keep everything tight, and press through the floor.
The more you can minimize your walkout, the better. This is to maintain tightness, save time, and generally save your legs as well. Longer walkouts are bad walkouts.
Finally, foot stance. I keep my feet about 1.5 shoulder width apart, toes pointed out, feet firmly screwed into the floor, like I’m trying to spread the world apart underneath me.
Then, it’s time to squat.
Descent
There are many different cues to help people squat, or more correctly, squat down. While many people might complain that they lack the mobility or strength to squat, this is often not true. They just lack the knowledge and body awareness to do it. People tell others to emulate how a baby squats, but this is ultimately bullshit. Would you take advice from a baby on how to drive a car? Write an essay? Learn how to paint?
The only thing babies can do in the real world is eat, sleep, defecate, cry, and float. Babies and adults are two completely different things, and you simply don’t have the body nor the bone structure of a baby (unless you’re incredibly unlucky), and the lack of coordination that babies usually display should be proof enough that you can’t trust a baby’s ability to move.
No, squat in a way that’s right for you. That means figuring out what your ideal squat should look and feel like, and there’s a few different ways to do this. As Greg Nuckols eloquently put it, “a squat is a squat is a squat”. The rules for a squat are generally the same, and the benefits of squatting are also the same across the board, with minor differences based on leverages. Someone with very flexible ankles will be able to squat with a much more upright torso, but their squat will still be limited by back stability and helped tremendously by hip strength, which means once they near their 100% 1RM, they’ll quickly look like everyone else coming out of the hole, no matter how much their push their knees out to begin with.
Some people tell you to squat through the heels. Others tell you to keep your chest up and out. Others say to break at the hips first. Or the knees first. It really depends on what you understand as a squat to begin with, and what your squat form looks like right now. Without a coach or an experienced friend, all you can do is watch different elite powerlifters squat in different ways, and emulate their movement until you find something you’re most comfortable with. Then stick with that. But, to clarify a few things about descent:
- Your knees and toes should be pointing in the same direction, yes, but you don’t need to squat with a super narrow stance. Most of the strongest people on Earth don’t.
- The bar should go straight down, and straight up, throughout the squat. It should always hover above midfoot, not above the heel. If you’re rocking back and forth in your squat, you just need to squat more until you get the movement down right.
- The tripod of the foot applies. A good squat distributes the weight throughout the foot on equal levels in three points – the heel, and the two opposing sides of the ball of the foot. That means don’t let your feet collapse inward, and don’t have flat feet.
- Don’t good-morning a squat, but don’t think that squats have to be perfectly upright. Max effort squats will always start out of the hole with the ass coming up first, followed by the lifter working as hard and fast as possible to get upright. The angle of your torso will depend on the position of the bar on the back, and of the length of your femurs, your shin bone, your squat stance, your ankle mobility, and the length of your torso.
Useful Squat Variations
There are a million ways to do the squat, but there are a few key squat variations that have helped me tremendously and I think everyone should employ these in one way or another.
Front Squat – No other exercise will build up your back strength and stability in the squat as the front squat, and I think you should front squat at least 25% of the time you’re squatting a barbell. The reason why they’re tough is simple – front squats put the barbell even further away from the hips than high bar and low bar squats do, so your back has to work even harder to stop itself from collapsing. A strong front squat is generally also going to help you back squat more, provided you’re doing both, and not just one or the other.
High Bar Squat – I personally still do high bar squats, mostly just because I actually like doing them. The jury is still out on whether they contribute more heavily to quad hypertrophy than low bar squats, or if there’s any real benefit to squatting in the full range of motion possible with a high bar squat, but I’ll go out on a limb and say that going ass-to-grass on high bar squats to complement a lot of low bar squatting is probably a healthy idea.
Paused Squat (Low Bar) – I’m a proponent of doing paused squats in the same style that you do competition squats, which means, if you’re squatting low-bar you should do your paused squats in a low-bar style. The other thing to keep in mind is that some people tend to drop too far down into their paused squat, which isn’t exactly right. Consistency is key to not missing a lift due to poor depth, which means you want to hit depth every time – but not to the point where you’re hitting “more” depth during warmup sets and paused squats, and then cutting your depth short during working sets and PRs. Always hit the same amount of depth, especially during paused squats.
One way to make these even tougher is to go for breathing paused squats. Instead of 3-5 seconds, aim for 10 or more. Drop the weight (obviously) and do a few sets, 4-5, after your main squat work. Be sure to film yourself at the beginning to make sure you’re actually spending enough time in the hole. You’d be surprised how often you come up at the 2 second mark, rather than waiting a full 3 seconds.
1 & ½ Squat – I do these on a smith machine for hypertrophy after every squat workout, but you can do them with a barbell as well. The 1 & ½ squat is basically just a squat where you pop down into the hole, come up about halfway, pop back down in the hole, and then come up to lockout. This puts you in the hole twice for every rep, which is obviously going to build your confidence down there, and help you identify exactly when you should be coming out.
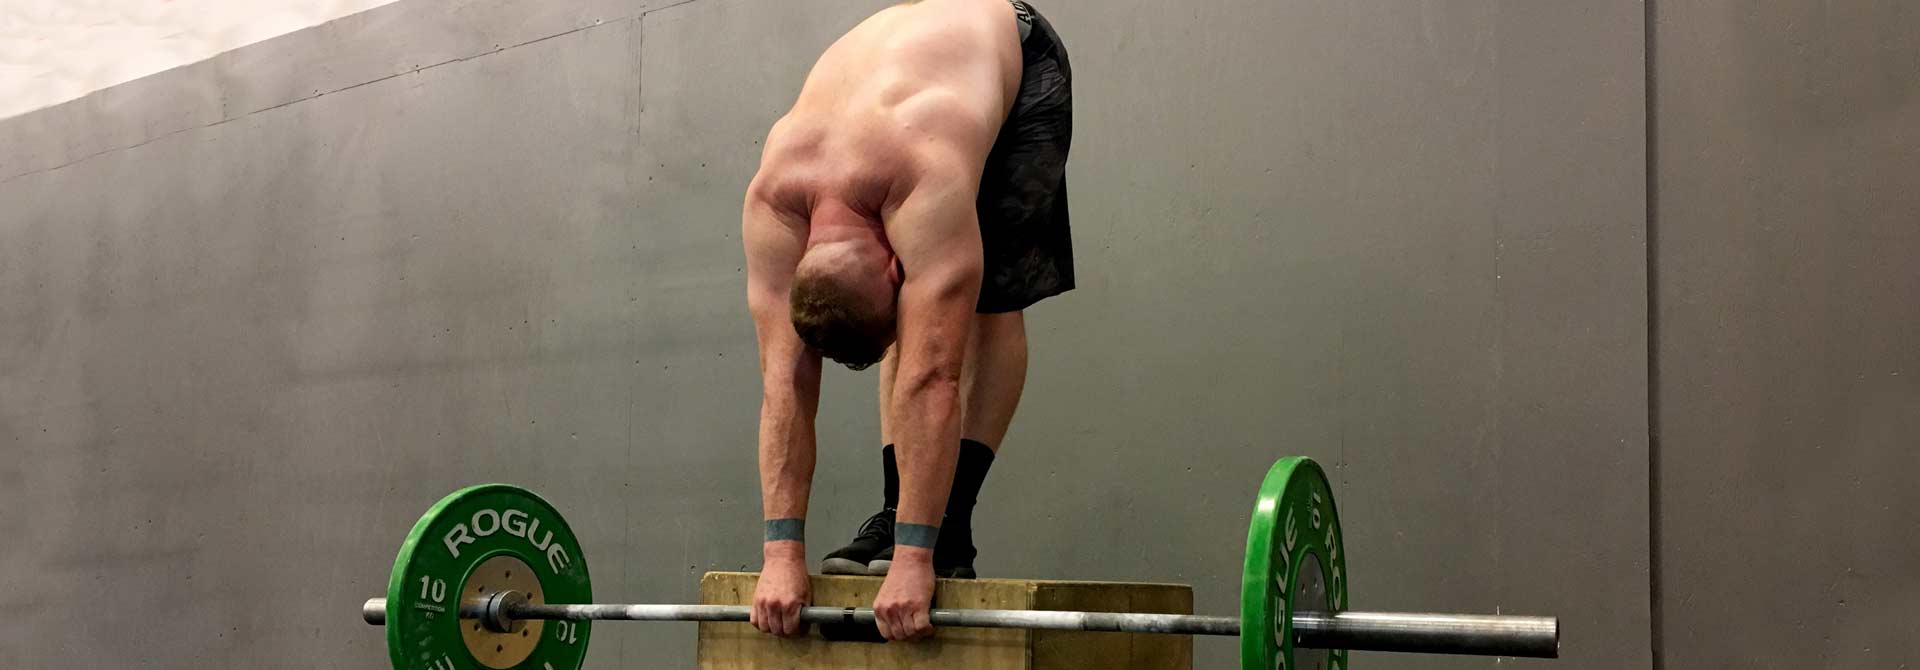
There are other squats, but these are probably my top four. Pin squats or Anderson squats are also famously used to help people who struggle coming out of the whole, or who struggle with tightness, but I find paused squats and 1 & ½ squats to be functionally similar and overall better for your squat game. Something that isn’t mentioned often but should be practiced maybe once every two weeks or once per cycle is a walkout. I do them for both front squats and back squats, and they’re basically overloaded squat walkouts where I don’t squat the weight but hold onto it for 10-30 seconds. Aim for about 1.5x your current 1RM, and over time, you’ll get more comfortable with squatting heavy weight.
If you’ve never had a PR on your shoulders before, it can be demoralizing to realize how much heavier it feels compared to some of the other weights you’ve been squatting recently. This can take a lot of wind out of your sails and generally set you up for failure. Walkouts help you get used to that feeling of impossibly-heavy weight on your shoulders, so you can be more comfortable and confident prior to your big PR. Walkouts and isoholds – especially for the front squat – also build a ton of upper back stability and strength.