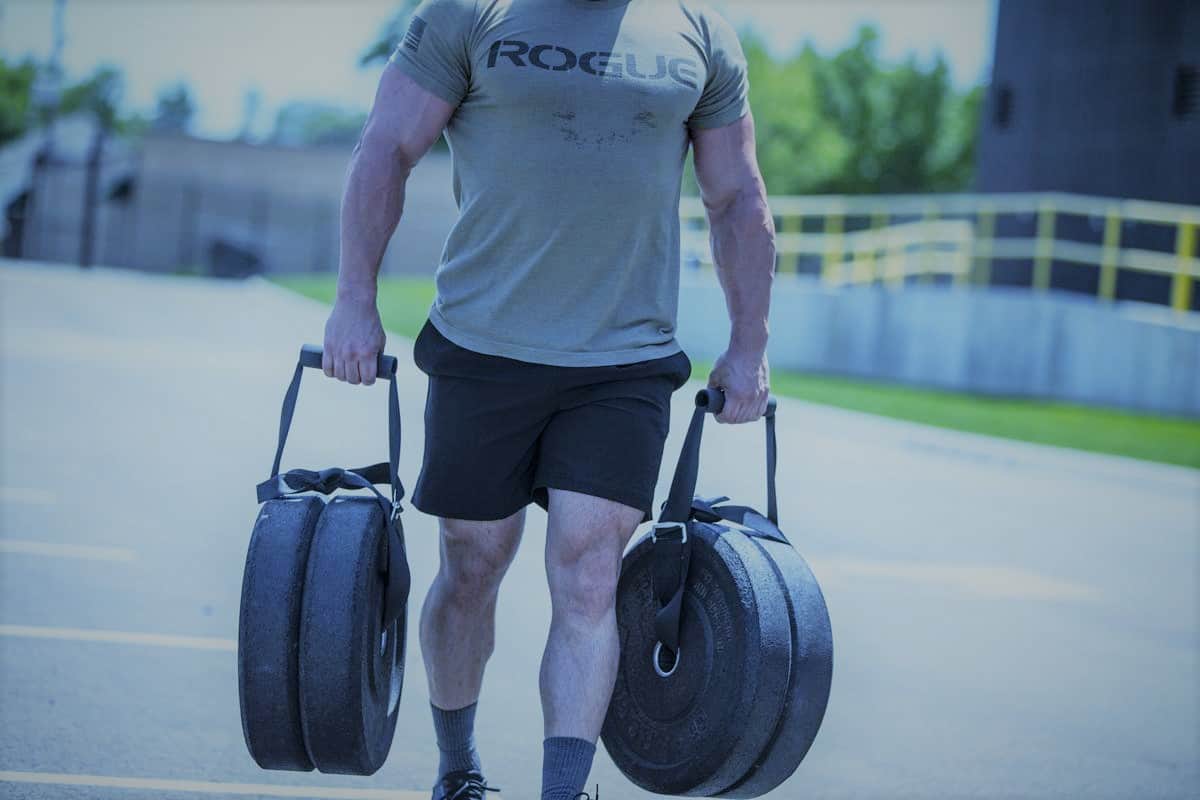
If you’re interested in the sport of powerlifting and want to start powerlifting, it helps to make some friends in the weight room. The first piece of advice that I can think of is to find someone at your gym who regularly trains and befriend them. Don’t just hit them up in the middle of their set, though.
Wait until they’re getting ready to leave or have just arrived and talk to them about your newfound interest in the sport and how you’d like to start powerlifting. 99% of the time, they’d be thrilled to help you get started, watch your form, or offer some tips – as long as you don’t barge in on them mid-workout. Don’t expect to gain a training partner, but it helps to have someone around who knows how to lift.
If you’re completely on your own, that’s fine too. My powerlifting start was solo, too, with no other experienced lifters around. And although I made a lot of mistakes over the years, I’ve learned quickly (from strong friends, too) and online resources were a tremendously important tool towards getting stronger and figuring out what works and doesn’t work.
If you’ve never lifted a barbell in your life, powerlifting can be a very intimidating sport – but it’s also a sport explicitly designed to allow nearly everyone to join in. All you need to do to qualify for most IPF-sanctioned powerlifting meets is complete one squat, one bench press, and one deadlift with a minimum of 25kg (a 20kg calibrated barbell and two 2.5kg collars).
That’s not a lot of weight at all, and you’ll easily lift far more with just a few weeks of training once you start powerlifting, barring any major disabilities. You don’t need to be monstrously strong to participate in this sport and don’t let others tell you any different. What’s important is that you’re as strong as you can be.
If it’s your first time at a gym, I strongly urge you to go through some of the basics before you hit the weight room. These are:
- Bodyweight pushups.
- Bodyweight squats.
- Bodyweight hip hinges.
Complete a pushup from the plank position, not the knees. Complete a squat with your hips dipping below the knees, and a neutral spine (no excessive curve in the butt). Finally, complete a simple hip hinge. Just start from a standing position, “sit” your hips back slowly as you lower your torso, and aim to reach for the floor, then extend through the hips back into a standing position.
These exercises are meant to help you work on the minimum coordination needed for the big three. They’re very different from the three powerlifts, but the positions are similar enough that you get a good idea of how to start lifting, risk-free. If you’re already proficient at proper form pushups, squats, and hip hinges (even single-leg ones), you should have no problem lifting the barbell and quickly cleaning up in form when you start powerlifting.
Testing Mobility and Form
Always start with the empty bar, even if you’re relatively strong (calisthenics background, or other sports). The basic rules for the three powerlifts are that the deadlift must be performed from the floor, and completed with locked out hips and knees (locking the knees before the hips, usually), the squat must be performed with adequate depth (hips under knee joint), and the bench press must be performed with a slight pause on the chest (bar all the way down to chest).
We’ll go in order of how these lifts are performed during a competition.
Squat Mobility and Form
The back squat is arguably the most awkward of the three lifts for most first-timers. It’s not very natural for someone to squat with weight on their back if they’ve never done it before. On the other hand, the goblet squat is usually a far more natural lift, to begin with. If you or the person you’re training struggles with form in the squat and they’ve only got an empty bar across their back, it’s probably not the weight, but the placement of the bar.
Start with a dumbbell loaded in front (a goblet squat) and do a few sets to prime yourself for the back squat. Once you start to get used to what it feels like to load weight in the squat, try the back squat again. The form is simple: break at the hips, break at the knees, squat down until depth, keep the spine neutral (straight back), and come out of the bottom. Take and hold a deep breath before each rep, as that will help you engage your core and brace, keeping a stiff spine.
The first mobility issue people face when attempting to squat is in the shoulders. For some, getting the barbell on the back and holding onto it can be an extremely awkward position, especially if they have rounded and tight shoulders. If this is a major limitation, work on improving shoulder mobility and reducing tightness through door frame stretches and wall slides.
Mobility in the ankles is the next big limiter. Few people lack the hip mobility to squat deep (some do, but it’s not as common) but many lack the ankle mobility. You don’t have to go ass to grass, it’s okay to start with a parallel squat (hips level with knees) and work on mobility by letting the weight bring you a little deeper as your squat gets bigger. Another option is to purchase cheap weightlifting shoes. Avoid expensive squat shoes because you might not like squatting in a raised heel, and they’re expensive.
Unstable knees and an unstable back are the next common issues. Knees are hard to address. They may be a sign of flat feet. They may be a sign of inactive glutes. They may be a sign of poor squat mechanics requiring better balance and use of adductors (lunges and split squats are a good way of training these). Make sure your knees are tracking over your toes (let them go as far as they need to for you to hit depth), and pick a stance you’re comfortable with (wide, medium, narrow, they’re all fine). A curving or unstable back is usually a sign of poor bracing, which goblet squats and more practice can help address. It’s easier to address form issues in person, so try to find some help once you start powerlifting.
Bench Press Mobility and Form
The bench press is easier the shorter your arms are, and the wider and thicker your torso is. If you’re thin and lanky, however, this lift will be your nemesis for a while. Either way, the powerlifting bench press is very different from the typical gym bro bench press. Start in a seated position on the bench and learn to protract your shoulder blades. Imagine squeezing a pencil between your shoulder blades, as though you were trying to keep it from falling.
Lie back onto your shoulders while they’re in this squeezed position, with your nose/mouth perpendicularly under the bar. You don’t want to be too far up the bench, or you can’t lock your arms out without hitting the rack. You don’t want to be too far down the bench, or you’ll have to reach further up to grab onto the bar, naturally pulling your shoulder blades out of retraction. It’s important to keep those shoulder blades back to avoid an anterior humeral glide, i.e. your shoulders will roll forward and take on way too much force, risking injury.
Keep your feet planted firmly on the ground. Press firmly with your feet, as though you were trying to push your shoulders down and through the bench into the ground. If your shoulders begin to slide, grab a yoga mat or a band and use them for friction. You can push your butt up off the bench, just bring it back down once you unrack the weight. Take a deep breath before the unrack, grab the bar with a comfortable grip (usually wider than shoulder width), unrack it, bring it down to your chest (and consciously bring your chest up to the bar, mindful of keeping your butt on the bench), pause on your chest, and press.
Typical bench press mobility issues include previous injuries or issues with the shoulder causing discomfort or pain during the bench press. If you can’t do pushups, you’d do well to work on those before you move onto the bench (they’ll also help train muscles that stabilize the shoulder blades and keep your shoulders safe). If the bench press is uncomfortable but pushups aren’t, start by reducing your range of motion by keeping a block or solid object on your chest, so the bar doesn’t go all the way down. Try to find a comfortable range and extend it a little bit in every training session.
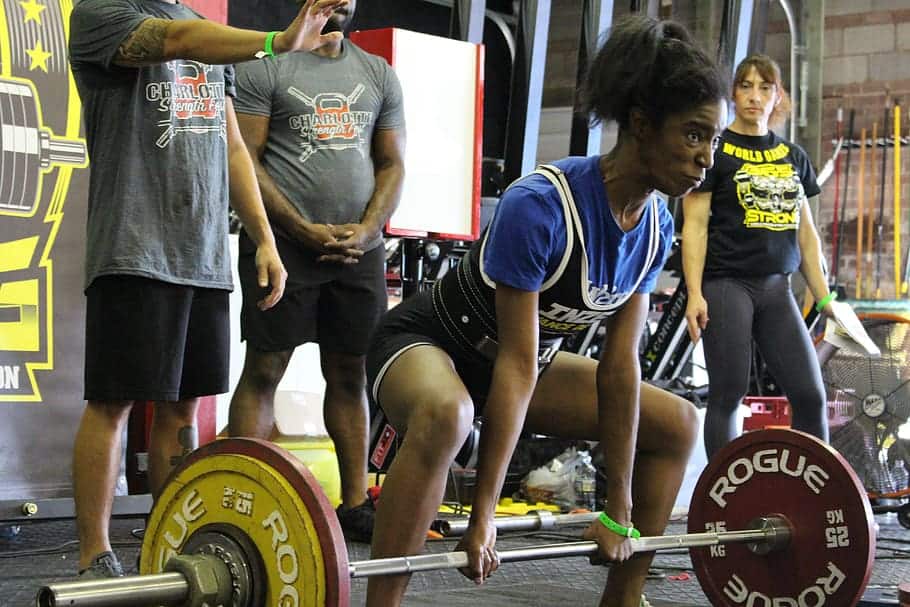
Deadlift Mobility and Form
The deadlift is arguably the most natural lift, but also the one that many trainees tend to injure themselves with. It’s a hip hinge, and all you’re trying to do is lift the weight off the floor. Most important here is the core. You need to brace properly to avoid flexing the spine – keep it neutral, take a deeeeeep belly breath, and hold it throughout the lift.
The next important point is to keep the bar close to your body. Start with the bar above your midfoot, the exact middle between your heel and toes. This is typically close to where you tie your shoelaces. Stand with your feet at shoulder width and grab the bar outside of shoulder width. Take a deep breath and pull your hips down slightly, until your back is straight, and your shins lightly touch the bar. Your hips should still be a good bit higher than your knees, otherwise you’re just attempting to squat.
Lean back slightly (almost as though you were trying to leverage the weight off the ground with your body weight) and press through your feet, getting the ground away from you. Extend through the hips, like a hip thrust. Think of it as two steps at first: press off the ground, finish with the hips. You want the two to occur almost concurrently.
By keeping the bar close to your body at all times, taking a deep belly breath, and pushing with the legs (not pulling with the arms), you should be avoiding most beginner mistakes. Again, form correction is best done in person. Hamstring tightness can be a mobility issue in the conventional deadlift (usually only if you have a short torso and very long legs), so stretch those hammies often.
Picking a Program
There are countless beginner programs, so it’s all very overwhelming. None of them are bad, really. As long as you’re going to the gym and regularly squatting, deadlifting, and bench pressing, you’re doing fine. It’s always best to start with a coach, but that’s usually only advisable if you’re scouted talent, or are already really gifted at this, and want to take it seriously from the get-go. Otherwise, pick anything that fits into your schedule.
I typically advise against Stronglifts 5×5, because the frequency of the lifts is far too low for my taste, and training at only 5×5 greatly limits you. Find a program that has you doing each lift at least twice a week (you can deadlift once), but ideally more often than that. Full body training is fine too. Something like:
- Start: Pick a day to test your maximum weight for a three-repetition set, without failure (stop when you feel you can only do one more). Add 10% to that weight. That’s your 100%.
- Monday: 5 sets of 5 of each lift, 80%.
- Tuesday: 3 sets of 3 of each lift, 90%. In your last set, do as many reps as you can (AMRAP, without failing, i.e. leave one in the tank).
- Wednesday: Rest.
- Thursday: 5 sets of 5 of each lift, 80%.
- Friday: 4 sets of 8 of each lift, 70%. Add 5lbs to your bench press, and 10lbs to your squat and deadlift for next week. If you did over 10 reps in the AMRAP sets, you can add 10lbs and 15lbs respectively.
If you want to train five times a week, throw in conditioning and core work on a Wednesday, and be sure to do pulling exercises at least three times per week (pull-ups if possible, machine work and dumbbell rows otherwise). If you have more time, add some bodybuilding work after your powerlifting work, hitting the upper body twice and the lower body twice.
Growth Happens at Home
The number one mistake beginners make can cost them all their gains. And that’s ignoring the obvious truth: the gym is only half of the equation. If you’re training hard but you’re not paying attention to your nutrition, eating too much or too little, and getting roughly 4-5 hours of sleep a day, you’re not going to be making great progress.
Lay off the snacks and sodas, eat better meals, be consistent with your feeding and sleeping times, and go for 8 hours of sleep a day. Abs are made in the kitchen, but muscles are built while you sleep.
What About Plateaus?
Once you start struggling to make weekly progress with your current program, it’s time to switch to something more effective. Linear programming only works as long as you continue to make weekly gains, but you can try to continue to gain strength on a linear program that adds weight every cycle (3-4 weeks) rather than every week. This is slower progress, but it will let you get farther as your body has more time to adapt.
Alternatively, pick up a program with periodization. If you’ve built a solid foundation of strength (at least six months, usually a year), you can switch to a program that cycles hypertrophy and strength blocks. More on that here.
Pro Tip: Get a Coach
If you’re in this just to have fun and beat your old lifts, you can continue doing it on your own and easily outlift most people in your town through years of hard work. But if you love it, or if you’re realizing your own potential, and want to go Regional or National, you’ll need a little help.
Find yourself a powerlifting coach and work with them to develop a program tailored to you, and not just your training archetype. Nothing beats having a good coach if you want to get serious about this sport.